So you want to edit Super Metroid Tilemaps?
What is this?
Editing tilemaps is a way to work around sprite size and tile usage limitations. It is a task of patience and devotion, but well worth it in the long run. Impressing your friends with kickass tilemap hacks is only a short reading away.
What do I need?
-A headerless Super Metroid ROM with (JU) and [!] seals.
-A hex editor
-A SNES Emulator
-A brain
Okay, let's begin.
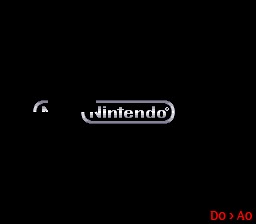
Sure. First off, open your ROM in a Hex editor and jump to the offset 0x600BB. It is the silver 'Nintendo' logo from the intro. Once there, pay attention to the first two bytes. 0E 00. These first two bytes indicate the size of the tilemap, in this case it's 0E tiles, which is 14 in decimal;

These are the very 14 tiles that the game uses for the 'Nintendo' logo's tilemap.
You can change the size of the tilemap easily by changing the value, so it reads more tiles than 14, but then the original tilemap after that will corrupt unlesss you repoint it or make it smaller. Keep cautious!
The thing here is, let's say you want to edit the graphics of this logo to something else. Sure, you could pop Tile Molester open and edit the graphics to anything you want.. but what if you want it to be bigger? That's where the tilemap editing kicks in. Editing graphics does what it's supposed to; edits graphics. The major problem is that if you want to expand your sprite size, you're screwed without tilemap editing. Editing tilemaps is editing where the sprites that build up the final product go and what they are made of. So Let's edit these tilemaps then, After the 0E 00, you'll find lots of other bytes;
30 C2 00 CC 30 20 C2 00 CA 30 10 C2 00 C8 30 00 C2 00 C6 30 F0 C3 00 C4 30 E0 C3 00 C2 30 D0 C3 00 C0 30 30 C2 F0 AC 30 20 C2 F0 AA 30 10 C2 F0 A8 30 00 C2 F0 A6 30 F0 C3 F0 A4 30 E0 C3 F0 A2 30 D0 C3 F0 A0 30
They represent each piece of graphic on the pic above. But since the logo uses only 14 tiles, why are there so many bytes? Because each tile is defined by five bytes. X, Y, Priority A, Priority B and Tile to use. Let's chop the bytes to nice little 5-byte rows:
30 C2 00 CC 30
20 C2 00 CA 30
10 C2 00 C8 30
00 C2 00 C6 30
F0 C3 00 C4 30
E0 C3 00 C2 30
D0 C3 00 C0 30
30 C2 F0 AC 30
20 C2 F0 AA 30
10 C2 F0 A8 30
00 C2 F0 A6 30
F0 C3 F0 A4 30
E0 C3 F0 A2 30
D0 C3 F0 A0 30
That's more like it!
Let's observe the last 5-byte array, D0 C3 F0 A0 30.
The first byte, D0, is the X offset. Modifying this value will result in the displacement of the tile in the X axis.
The second byte, C3, is the Priority byte A. It defines:
-Whether the tile to print is a 16x16 block or an 8x8 tile. (Bit 7)
-Add $FF to the X offset value. Also known as 'X Offset high byte'. (Bit 0)
The third byte, F0 is the Y offset. Modifying this value will result in the elevation of the tile.
The fourth byte, A0, is the Tile to use. In this case, it is tile A0. Row A, column 0. Simple as that. Tiles are retrieved from its respective graphics page.

Tile A0 =

The fifth and the last byte is Priority B. it defines:
-Flipping the tile vertically (Bit 7)
-Flipping the tile horizontally (Bit 6)
-Layering of the tile; tile 'depth' (Bits 5 and 4)
-If set, load graphics from the next graphics page. (Bit 0)
Easy as that! With this information, you should be able to edit tilemaps like a breeze, or even write up an editor! B)
Just to clarify: The title screen is definitely not the only tilemap in the game. Other ones that can be edited just like this one include, but are not limited to:
-The red scrolling 'Nintendo presents, 1993, Metroid 3' texts from the intro
-Ceres Space Station and Planet Zebes from the intro and the ending
-Large Samus ending sprites
-The ending texts 'The operation was completed successfully, Clear Time'
-General enemy/object sprites
You can always find more tilemaps by searching for patterns after the very first tilemap at 0x60000 and with the help of Geiger's SNES9X debugger and its breakpoints feature. Happy hacking.